Showing posts with label boxes. Show all posts

12 May, 2015

No-Glue Box by Kathy


Hi, it's Kathy today, and I've another box to show you this time. 

I received some cookery ingredients through the post recently - they are cleverly packaged so that the larger box fits through a regular letterbox, and in that box are four smaller ones. 
These little, plain kraft-coloured boxes are very cute and tbh, as there's no glue or anything holding these boxes together, they were "crying out" to be unfolded and used as a template for something prettier!

Although the box is made from my "drawn around" template, I've also made sure to save it in my Cameo files so that I can not only use it again, but scale it up or down in size too

I've used "Thyme Blossoms" designs from this month's showcase CD "V. Funky" to make this one - printed on both sides of my sheet of textured white Bazzill card so it's pretty inside as well as out. Here you can see it all unfolded
 
I made a "belly band"  not only to keep the box closed, but also by cutting out and layering a couple of flowers from one of the paper designs, it's the decoration too

Materials and Tools

Papers: "Thyme Blossoms" from the Funky Hand  V.Funky  CD
the designs were all printed on textured white Bazzill card 
EK Success border punch
and then I made a small 10cm square gift card to match, using another cut out flower, some pearls and a piece of Bakers' Twine

Don't forget, this CD is on offer in the SHOP for just £1 at the moment so don't miss out! Here's a quick look at just some of the designs you'll get on the CD

We'd love to see what you make with Funky Hand goodies too.....
Thanks for visiting today

04 February, 2015

2 Little Birds

Hi, Kathy here today with a cute little box made using
 the "I Heart You" download

I've been meaning to make one of these birdhouse-shaped boxes for ages and what better time than now?
This box opens at the base for adding some little treats - though I think it would need a little bit of tape to make sure it stayed closed.  If I made another I would try and come up with an alternative - maybe make a little door at the back and seal the base up altogether.

 I printed the designs I wanted to use onto white Bazzill card. then cut the box pieces one using my Silhouette machine. 
 When I print onto card I cut the 12x12 sheets down to just under A4 width, which leaves a long narrow cut-off which I don't want to waste, obviously! 

 One of the great things about Funky Hand downloads is that you can resize the designs - maybe "cut" a little bit off the side, then alter your printer's settings so you can print onto odd sizes of paper or card.  So I print the main pieces on the large sheet, then use the off-cuts to print any smaller pieces I need - I hope that makes sense!

Basically, by doing this, and printing on both sides I only used 1 whole sheet of 12x12, plus an extra off cut length from my box of scraps

Materials and Tools
Silhouette machine to cut box shape
Spellbinders Nesties: plain circle and Lacey circle
EK Success border punch for "tiles" on roof and the gable design

Heart feature at the top of the box is cut from one of the papers
Little birds are hand-cut, as is the door
Perch is just a tightly rolled scrap of paper, glued up then poked through a small hole made with needle tool and bamboo skewer
The birds are attached to the box with cut up pieces of foam tape so they stand away from the box


 There you go - a cute idea for a little Lovebirds box to fill up with treats for your own loved one. I hope you like it

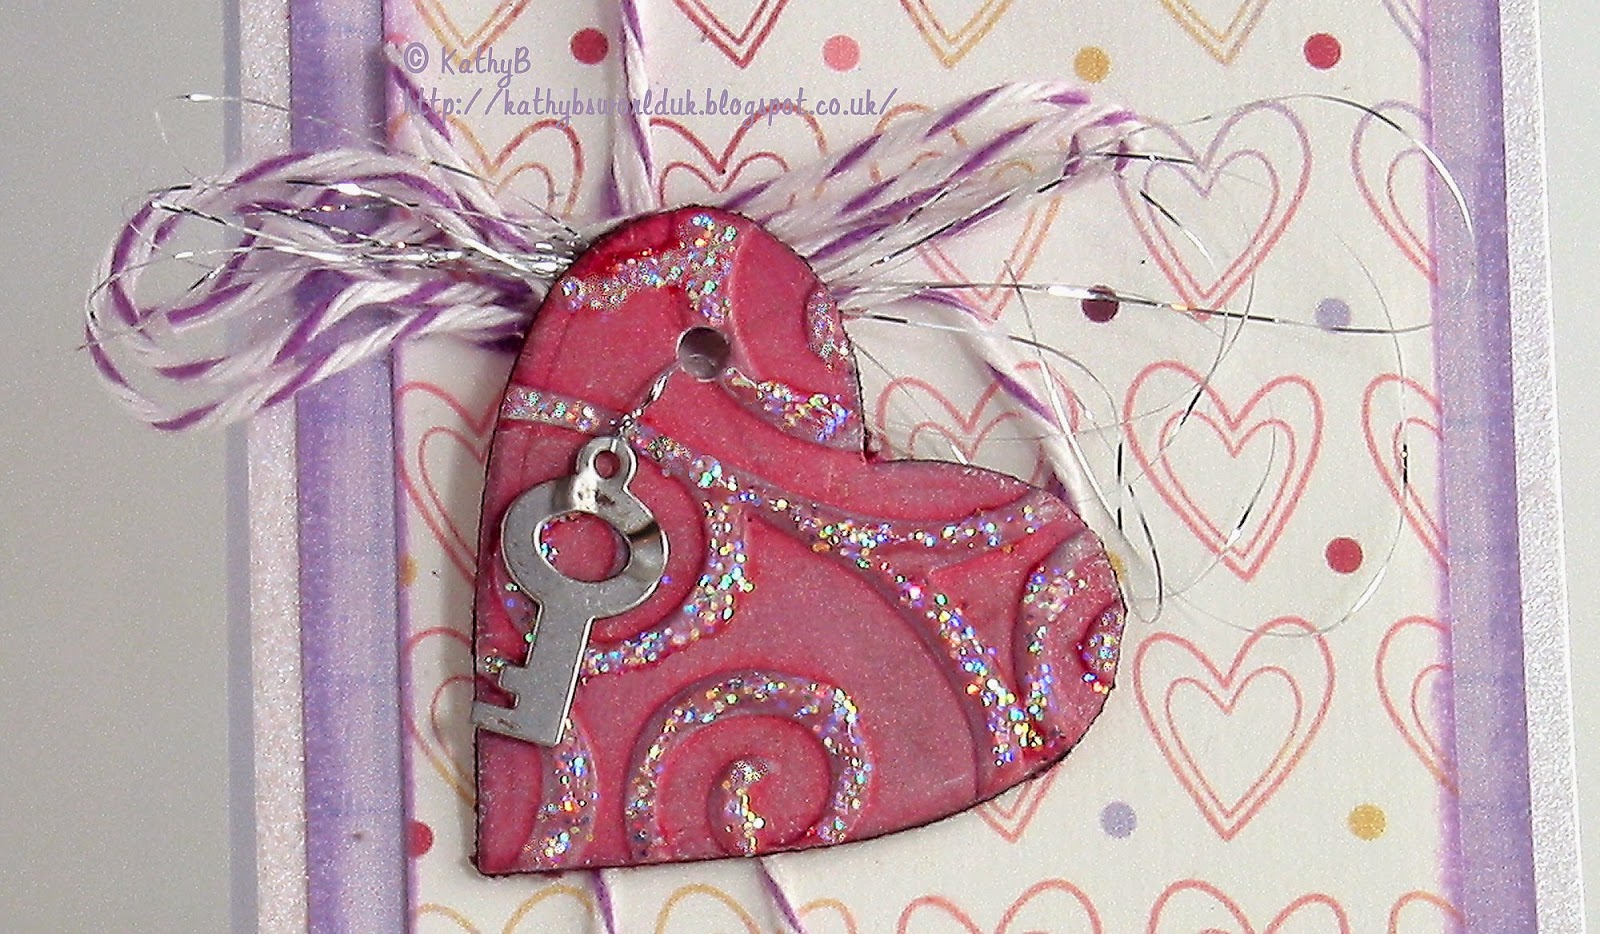
I had some leftovers after making the box so I made a scrapling card


Materials and Tools
Scraps of  Funky Hand Download  "I Heart You"
Baker's Twine and Silver thread
Small metal key charm

The big heart is made by covering both sides of a  scrap of card then die-cutting (DieNamics Nesting Hearts)
I then embossed it with a Cuttlebug "Swirls" folder, inked lightly with a silver ink pad, then traced over the swirls with Stickles Ice glitter glue (Crystal Ice)
The tiny punched hearts were shaped with an embossing ball tool then dixed in place with a blob of Glossy Accents


Remember, all the "Love themed" downloads are on a Special Loved-Up price of only £1 each all through February, so a great time to stock up on downloads you may have missed.

We'd love to see what you make too.....
Thanks for visiting today

16 August, 2014

Sleigh Ride in Summer

Hello

It's Kathy here today and I'd like to share something I made this week using a new die and my fabulous Funky Hand stash.

Since becoming the proud owner of an eBosser machine, the world of A4 dies and embossing folders has been opened to me and I recently got my hands on a fab die for making a really neat gift bag. 
 The finished bag is 12cm wide. 18cm high and  7cm deep - so plenty of room for goodies in there!


As this is a big die making a good sized box, you need to cut the die twice and you need 2 sheets of A4 paper - so what better way to give the die a test run than with some Funky Hand designs.

Do you recognise these papers?
I chose to use "Sleigh Ride" which was one of the 2013 Christmas lines.  A little bit "left field" for crafting in the middle of August, I know, but I love these colours and several of the designs are not really Christmassy at all - it's such a shame not to use them for other projects, don't you think?

So I printed two copies of the gorgeous spotty pattern onto some white Bazzill card (any sturdy paper or thin card would do), plus another sheet to make the striped "border", the bow, gift card and flower decoration. As I knew both sides of the tag, bow and flower would be seen I printed on both sides of the card I needed to make these.
Then it was just a case of doing the die cuts and sticking it all together. 
I used one of the bits of waste (from the hole in the handle) to make a closure for the bag.
The bow and the tag come in the die package.
The bow is clever as its just one piece and you fold it up to create the bow.
I cut the tag twice, then tied the two pieces together with some seam binding.  I punched a tiny heart in the corner of the top piece
The flower is made with 5 punched flowers  here's a closer look at the decorative bit:

 Ingredients
"Sleigh Ride"  download from  Funky Hand
Paper or card for printing
Gift Bag with bow and tag; A4 die form Xcut 
SU Blossom punch, Tiny heart punch
Seam Binding or Ribbon

The bag was so quick to make and using Funky Hand papers means bags and boxes look great even before you start decorating them! 
I'm thinking this would look fab in the gorgeous deep blue shades of the Winter Wedding collection for a more masculine gift wrapping.  I have the lovely pin striped papers in mind, but I just need to figure out a more manly decoration that a bow and a flower and then give it a try.
That's it for now - I'm off to print out those Winter Wedding papers and
 have a go - if you pop by my blog sometime soon, you might find that I actually got it done ;) 
Stranger things happen at sea.....as my Grandad used to say.

Thanks for visiting - please leave a message - it lets us know we're not just talking to ourselves!

Happy Funky Crafting

08 March, 2014

Little Boxes

Hi there
Kathy here this time and I've a tutorial to share
I've made a few of these little boxes now and they are quite simple to make. I've used Spellbinders Nesties Label 26 for the top and base sections of my box, and kept to a simple square shape for the actual box section.
 There are lots of photos, which I hope will make it nice and easy to follow

Start off by printing your chosen Funky Hand designs onto both sides of some white card.  I like to use a basic textured Bazzill type card (cut to A4), but just printing onto any white card would be fine.
I've used a few different designs as you'll see in the photos, but you could just make the box using one or two designs.  You''ll need a couple of sheets of printed card.  I've used our current Forgotten Funky spotlight collection "Minty Madness" for this box. 
 If you scroll down the blog a bit you'll find a whole array of other lovely projects using this collection
You'll also need some thicker card - I use card cut from an empty cereal packet
From the printed card
*Cut a 6cm wide strip from the long side.  Crease at 4cm as shown in the photo above
*Cut 4 of the 2nd largest Spellbinders Nesties Labels 26 die. Ink the edges and adhere 2 of each (if using different designs) together - be as accurate as possible. These will be the base and top of your box
* Cut 2 pieces measuring  9cm square

From the cereal packet
* Cut 6 or 7 (depending on thickness)  pieces measuring 6.5cm square
* Glue just 2 of the card squares together and set aside for the base section

* Trim a tiny fraction (1 - 1.5mm only) from 2 adjoining sides (not opposite ones - you need to keep the shape square) of each of the other squares and then glue them together. It's important not to trim away too much or the lid will be too loose at the end
Cover the card squares with the 9cm squares, wrapping around and making the corners as neat as you can.  Set the thicker of the squares aside for now
Using the thinner covered cereal packet piece, line up and mark the long strip as shown so that it will wrap around all 4 sides and have an overlap at the end. Make creases and cut slits up to the 2cm fold line
* Adhere the square piece to the side strip starting with the second section along.  Next glue the third and fourth sections under, and then the overlap.  Apply glue to the outside of the overlap piece and then glue the first section in place to cover it, and end up neatly at the corner of the box

 The underneath should look like this
Now apply glue to the box you've created and centre over one of the die cut pieces.  If you've done as I did and used 2 different designs, you'll need to decide which will be on the "inside" edges and which will be the outer ones
Finally adhere the thicker cereal packet piece to the 2nd of the die cut sections.
Trimming those tiny slivers from the card squares should mean that the lid will fit nicely into the top edge of the box - have a quick check before the glue has dried completely, then if you find the fit isn't snug enough, take the cereal packet piece off quickly and cover with another square of paper - that might just be enough to make it work
 It looks a bit dull and boring at the moment, doesn't it? 
But the fun can begin now because it's time to decorate!
I've made a couple of other boxes in the same way - these have both been shown here before, but hey, I might as well show them again

This one uses the same Labels 26 die as the one above, and the papers are from the Christmas 2013 "Silent Night" download collection

This next box is made the same way, but I've used a nesting heart set of dies by MFT Die'Namics to cut the shapes. These papers are from the gorgeous "Winter Wedding" download collection

They are fun to make and easy too - and of course Funky Hand papers make it really simple to get exactly the look you want. 
 I hope you'll have a go - and if you do I would soooo love to see your boxes, so please don't forget to let us know

Happy Crafting

23 January, 2014

Love Love Love Box and Card

Hello, hello! Tabbatha here today to show you a lovely candy box and card for the upcoming Valentine's Day. I love giving away sweets on holidays and with V-Day only a couple weeks away I thought this was a perfect opportunity to play with some fabulous Love Love Love Valentine's Day Themed downloadables.


For these creations, I used a trick that Kathy uses all the time - I printed the Love Love Love papers on some textured white cardstock. I printed it on a full A4 sheet, so that I could easily use my Silhouette to cut out the box shapes.

The papers printed out so well that the box looks über cute and totally profs with the clear window. :) 

I used the same shapes and paper to create the card. I kept it simple, since the box is really the thing that I wanted to showcase. A pretty, sparkly bow adds a little bling, but not too much. 


So, here are two, easy and pretty creations that totally showcase the Love Love Love papers. Perfect for Valentine's day or any other day that you want to give someone special a reminder just how much you love them. :D


30 October, 2013

Silent Night Gift Box

 Hello, 

it's Kathy here to share a little box made with papers from the "Silent Night" collection - one of two  wonderful Funky Hand Christmas sets for this year. 

Silent Night is a beautiful paper set of warm and subtle traditional colours and the funky edge you've come to expect from Anice's designs


 This box was made in the same way as a heart shaped one I made earlier in the year.  It's much simpler than it looks as all you need are some Funky Hand designs printed on both sides of some Bazzill or other card of similar weight, some Spellbinders dies and some thicker card - such as an old cereal box. 

A peek inside shows why I print on both sides of the card
All Papers: Silent Night by Funky Hand 
 
Next time I'm here I'll post a little tutorial on how to make the box.
Of course the most fun bit is decorating it and I've used the soft creamy coloured design from "Silent Night"  to cut a whole load of different snowflake shapes, added some glitter and layered them up on top of the box.  Adding some cream organza ribbon and some gold and red berries finishes this festive gift box.
I hope you like it


Don't forget to link up your Funky Hand creation with the linky below - we'd love to come and visit you!

See you soon.

Happy Crafting


22 December, 2012

It was (almost) the Night Before Christmas

.......and all round the Funky Folks' Houses everything was wrapped and serene and ready for the big day....
or maybe not....
because if you're anything like me (it's Kathy here btw)  you'll be crafting and tweaking things right up to the last minute.  In fact, while I was writing this I was just thinking that all I had to actually make now were a few pretty things to decorate my parcels when I remembered a gift card holder of some sort that I still need to make.  And it's for my MiL, so forgetting wouldn't be a good more.  ooops!
Anyway, I hummed and ha'ed about what to share with you this close to Christmas and then decided a little reminder of  a couple of packaging ideas might be a help for last-minute wrapping, plus a couple of ideas for making your parcels look just a bit special when they are sitting under the tree - it's always amazing how adding a bit of something made from paper really makes a gift look extra special
First though here are those ideas for the actual packaging
If you've got the Funky Hand Papercraft Factory CDs then don't forget to check out the templates sections for some great ideas;
Slice of cake shaped box template -  Happy Happy Birthday CD
Pillow box template - Twelve Crafters Crafting CD
Gift card holder - Wishes and Kisses CD
Exploding box - Wishes and Kisses CD
There are also a couple of envelope templates on the CDs - great for making presentation envelopes for gift vouchers or tokens and so much nicer than a plain envelope or dull card.
Don't forget to check out the shop site too for Anice's wonderful "how to make..." videos!

The pillow box template is one of my favourites and is soooo easy to use.  I've made a shamballa bracelet for each of my three nieces
This pillow box will be for one of them

Pillow box template:from Twelve Crafters Crafting CD
Designs from "Presents Wrapped" download, Printed directly onto thin card
Flower topper made using the flower template from Wishes and Kisses CD

This little origami box will be perfect for another of the bracelets - fabulously easy to make from a couple of paper squares!
You can find the link for how to make the box, along with instructions for how to make the flowery topper HERE
Papers and flower image all from the Daisy Day download

I do love to make a few "pretties" to put on my parcels - add a bit of ordinary curling ribbon, or even a scrap of tinsel and they really add some sparkle to your gifts.
Rosettes are just the simplest way to add pizzazz - you can make them from wrapping paper, or choose one of Funky Hand's fantastic papers to make it even easier as there are so many colours and designs you're sure to find something to match your wrapping!   I often just hand fold a strip of paper, but better still is using a die such as those from Memory Box and my trusty Cuttlebug!
I#ll be making loads of rosettes for my parcels this year, but I thought I'd show you a tag I've made  instead - these are fab for using up any paper scraps you have left from all those cards you've been making!
Papers are  from "Santa Baby" download

This multi-layered star looks complicated but is really easy - so easy that in a previous life I made them with a class of 6 year olds.  Use them "flat" with some curling ribbon and maybe a tiny offcut of tinself in the centre for a gift topper, or add more layers on the back then pierce a hole right through the centre and add some ribbon or cord to make a fabulous bauble
I've used the Winter Wonderland download for this one

Start by printing on both sides of your paper, then cutting a bunch of circles - either by hand, with a punch or with a die cutter - there are 4 circles in the star I've made
Fold one circle as shown in the diagram, then holding the four circles tightly together on top of each other, use the fold lines as a guide for making the cuts - stop cutting about 1.5cms from the centre
Each circle will now look a bit like this
Now curl the ends of each section inwards - you could use the pointed end of a pencil to help form the shape if you wanted.  Add a dab of glue to hold them in shape, the next photo shows one being made
Once all your stars are made all you need to do is add a dab of glue in the middle of the first one and stick star 2 in the middle, repeat with the other stars - they will take up the rounded shape as you go and you'll end up with something just like the one in the first photo.  

Here's another "star" decoration, this time made using 8 squares of paper.  I've used the Winter Wonderland download again for this one too

I used 10cm squares and the resulting star is quite large - great to put on a big gift box - but for my next one I'll start with smaller squares.
Again, you need to print on both sides of the paper before you begin
Cut 8 squares then fold each in half 4 times so there folds going straight and daigonally, and going each way. 
 Making these folds makes it easier to do the next bit


 With the square folded on one of the diagonals, push the corners (of the long side) in to form a square - or diamond shape if you prefer ;) crease firmly

 Now fold in the two sides of the top square so the top bit looks a bit like a kite shape like this:

Do the same thing with all the squares then join them all together by tucking each one under the "kite" shape of the previous one - use a dab of glue to hold them in place.  Eventually you get a shape like this, which you can decorate with ribbon, tinsel, glitter etc  Add a hole in one of the "points" if you want to hang it up
Looks complicated but really isn't, the folds are really easy quick and you'll have your star finished in no time!

I hope you've enjoyed my little bit of gift wrapping inspiration - even if it's a bit late for Christmas the ideas might come in handy for other gift giving occasions.

We'll be back soon with more ideas for using your Funky Hand stash - but please remember that we would really love to see what you make with yourss - the Linky Gadget is there to be used so please come and share your creativity with us soon.
Wishing you all a Very Happy and Creative Christmas
 

 The linky that you see below is for you to add pictures of anything you have created using Funky Hand products recently or what you have made using the latest Funky Freebie download available on the Funky Hand website www.funkyhand.com.