31 March, 2013

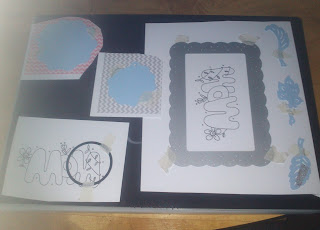
Ni's Geometric I Love You Sew!

Happy Easter Sunday everyone, its Ni here today to share some funky inspiration but before I do I just wanted to let you know about the Easter Sale and giveaway over on The Funky Hand website! There's up to 60% off some items and a special online Easter Egg hunt where you could win a giant Easter egg or a Funky Hand voucher, what are you waiting for get hunting, you don't even have to go out in the cold, you can do it in your pj's! ;)

Ok and now here is my make for today...


I'm not sure of the official name of this card but I just call it an angle card! Maybe someone can comment and let me know!
This is a fab card, a very different sort of shape that will definitely stand out on the mantle piece, and even better is where the grey section is on the front of the card its actually a pocket. You also get a pocket inside too.....


If you follow my posts here or my own blog, you will know I love making gift card holders, I think gift cards are a great idea, allowing the recipient to go on a free shopping trip and they get exactly what they want, whats not to like!

However with this card I have just used it for the funky geometric shape and have decorated my card with the gorgeous new I Love You Sew download and a few sewing style embellishments.
If you have missed them, then don't forget to scroll down for more inspiration posts from a couple of other Funkettes using this super new collection. There are whole page text papers, 'solid' pages as always to give you the perfect coordinating papers and even a really funky font alphabet!


I hope you like my make today and while I'm here I'll just let you know that this card and 4 others are going to be featured on my own blog this week for Ni's Funky Hand week, sharing projects made using recently released digi stamps and paper downloads, I hope you can stop by, enjoy your chocolate everyone! :) x


27 March, 2013

Mid Week Inspiration

Hope your week is going well and that you are looking forward to some time off at Easter- I'm off for a whole week and looking forward to some crafty time and some time to play some more with the fabulous new load  I Love You Sew  from Anice, and of course lots of chocolate too.
After playing with some acetate I decided to make an acetate card and used this lovely paper from the I Love You Sew  download and the sentiment from Happy Happy Birthday  Papercraft CD
If it wasn't for the pearls in the corners you might actually be fooled into thinking I could suspend shapes in mid air!


Remember we would to see what you have been creating with Funky Hand products and have a great Easter everyone

AllisonX

24 March, 2013

New Download Release! I Love You Sew!

Anice has released a brand new download over at Funky Hand and this collection is called I Love You Sew.  There are 22 papers plus an alphabet all for £3.19.  There are also some fab digi images too that have been released - perfect for those who love their cups of tea! 

I've made this retro dress card using some of the papers from the I Love You Sew download.  The skirt on the dress is three quarters of a circle cut from paper (I forgot to print on the reverse so coloured it with a Promarker!) and then folded.


I glued it over the body and then added some half pearls to hide the join.  I've added some inking and doodling around the edges of the other papers and finished off with a heart half pearl to the top corner.

This is a lovely download collection of papers which are really versatile - perfect for Birthdays or Anniversaries or Weddings!  If you need any more inspiration, just pop over to Funky Hand and have a look at the gallery - the Design Team have been busy!

Don't forget to link up any of your creations if you've used Funky Hand papers or digi's - just add your link to the blue frog below so we can all come and have a look!

21 March, 2013

Paper Piecing the easy way!

Hi and welcome to another post on the Get Funky and Craft Blog.  It's Anice here today and I thought I would share my slant on paper piecing images. Not everyone is great at colouring, I'm still working on it myself! So, if the image you are working with lends itself to paper piecing then it can be a great way to create a topper for your card or scrapbook page.  Other crafters wont do it in the same way as this but, this is the way that I find the easiest. It's sort of like Paper layering!

Right, first print out the image that you are going to paper piece, this is a rosette image from my craft CD Colour Me Happy.


Next you need print the image again over a backing paper that you want as the the outer section of the rosette. Cut out just that part of the rosette.


I could have just cut out the very edge of the rosette but I think that is fiddly and this is easier to stick down and then piece over the top. Hence the layering idea.  Of course you will stick down your paper, I've just placed mine on top in this picture as this is part of a tutorial I am going to be using in the near future with a craft group and I didn't want to have to cut it all out again!

So, do the same again with the image and a different backing paper and put the ribbons of the rosette in place.


 Next thing to cut out is the inner part of the rosette.


The final stage is to cut out the centre of the rosette.  I added a message onto the centre using rub-on letters from Doodlebug.


So, there is your image completed.  As I said you could cut out each piece of the image and stick it down and with some images you will need to do that. But, with this simple technique if you cutting out isn't that great, like mine! You wont have big old white bits showing through where you have miss cut and it doesn't fit.  It is a simple way to have a first go at paper piecing.  Would you like to see what I used this rosette for? Well you are going to even if you don't!


 All the papers, image and letters used on this card can be found on the Funky Hand craft CD Colour Me Happy which is available to purchase on the Funky Hand website www.funkyhand.com


I hope you have enjoyed this quick tutorial and it inspires you to have a go at a bit of paper piecing if you have never tried it before. We would love to see what you have been creating with Funky Hand products.  It's not a competition, no one will be judging you, we just like to see what you have been working on.  Add your image to the linky at the bottom of this post and let us all visit your blog and take a look.

Happy Crafting!
Anice xx

19 March, 2013

Simple baby card

Morning all, Amanda here, from a rather wintry Scotland, it is very white outside, but not as white as it could be so I gotta be thankful for that right?

I thought I would share this REALLY simple card with you today.  There is a wee sneaky peek at a new digi image from Anice, but it's nice and small and hopefully Anice won't notice and smack my wrists too much haha!

I used the Rainbow Polkadots papers.  I do love polkadots.  I drew round my double sided tape roll once on each sheet.  Once cut out, I cut them in half.  One half becomes the base of the pram, then cut the other in half again to make the hood.  Two small circles (I drew round my pritt stick lid this time....technical stuff here!) for the wheels.  It looked a wee bit bare so I found a wee sliver of pink ribbon and coloured it purple with a promarker to edge the base of the pram.  Then a small tag made with the BABY word digi image and it was done!

I do like a nice simple card, and this one is perfect for a last minute card, as it really doesn't take long to make.  You can also make it more fancy if you have the time :)

I also made a wee tag to go with this card.  It is paper pieced with the same polkadot paper, and just a few wee added pearls.

We'd love you to share any Funky Hand makes you've been making, either here or on the Funky Hand Facebook page.

13 March, 2013

Mother's Day

Hello All :) Sammylou here and today I would like to share the card I made for my lovely Mother-in-law with you.


It was made with the wonderful Hearts and Flowers download which I absolutely adore and find myself returning to again and again. Its wonderful shades of purples, pinks and greens are perfect for so many occasions and was my first choice when I began to make the card for Mother's Day.

The other fantastic thing about the download is that you don't need anything else to make a card. The flowers, hearts and alphas featured on the card are all included in the download! Just a bit of cutting and sticking and the card is made!

We would love to hear what your favourite collections are and don't forget you can post photographs of your Funky Hand makes on our facebook page, so please do share, we love to see.

See you all soon, Sammylou xxx

10 March, 2013

Happy Mother's Day

Here's another sneaky peek at the new paper and digi stamp download which is to be released soon......  It's Debbie here to hopefully share with you what I've made and inspire you to 'Get Funky and Craft' - couldn't resist sorry!

I decided I wanted to do a spotlight card where part of the digital stamp image is coloured in, i.e. spotlighted. Here are all the dies and papers I gathered together to die cut with my ebosser:
Then once cut and embossed I could collect everything together as shown below.


I used distress ink while the Mom digital stamp was in the die, coloured the spotlight cicle with promarkers and added a little glitter. I also rolled some roses and used the letter sheet from the download in my graphics program and chose which letters I wanted to use instead of printing and cutting into a whole sheet.

I really had a ball playing with these gorgeous new downloads. The funkettes are so lucky.
We'd love to see what you make with any funky hand goodies so please feel free to leave your link below or pop over to our Facebook page and leave us some pictures.

That's all from me for today. Happy Mothers Day to everyone.

Love Debbie x

06 March, 2013

A sneak peek....


Morning Peeps!! 

Its Lou popping in to see you all this morning with a super exciting sneaky peeky at a couple of the new releases coming to Funky Hand soon!! My gorgeous Funkette buddies and I have been busy creating some gorgeous makes for you all and Da Boss said I could share one of mine with you all today!!

So the fabulous mug is called 'The tea is on me' and is one of 4 gorgeous little digi stamp mugs that our Anice has designed herself and I love them! and the papers are from the new ' I love you sew' paper download (squeee! so excited about these papers because they are gorgeous!! just wait and see what the funkettes have been doing with them!)

I decided to make a simple little tea bag gift card because it just seemed like such a fun thing to make!! I like a bit of novelty!!


How did I make the card???!
1. cut an A4 piece of white card in half longways and then score it at 5 4/8" and 10 7/8". That sounds so confusing doesn't it!!! so lets take a peeky at how I did that...yup you guessed it! trusty score pal!!....
move your cardstock over to the left so that it is level with the 1/8 increment on the top of your scorpal (that's the first little line along the top in Lou language!!)

2. Score at 5 1/2" and 11 1/2". This will give you a little lip to turn over to close the card.

3. Punch 2 holes in the top for threading your  twine (squeeee! yes Bakers Twine is available at Funky Hand!!!) through.

4. cut your design papers and decorate away!! I made a pocket for the teabag inside and attached a little punched heart with twine to the teabag by sewing it through. On the front I matted up the design papers, added a punched border and then my gorgeous mug of tea popped up on some foam tape.

I love these mugs, they are so cute and the sentiments on them are great!

OOOOOh and while I remember, don't forget to share your Funky Hand makes with us!! You can share them here on the blog using our linky tool or over on our Funky Hand Facebook page.

Thank you for popping in!
have an awesome day!
Huge hugs Lou xxx