
Hi there everyone
So how are you liking our "Funky" new look?
We think it is so much better to show you all of our creations gradually throughout the month so that we can give you a little more detailed explanation as to what we did as "Funkettes" to make our projects, and hopefully give you inspiration for joining in the challenge with us.
Today it is my turn (Jules) to share how I interpreted Allison's theme.
Allison is our hostess for the January/February challenge and she chose the theme of "Going Round in Circles" .. .. .. mmm... .. a theme I can totally relate to as I feel that is what I do some days LOL!!!
Here is what I created and wanted to share with you today:

It is a circular easel card and uses the Funky Hand Download "Hearts and Flowers".
This is "one" of my favourite downloads .. .. mainly because I love "hearts" and the colour purple .. .. if you like the look of the download then you will find it available here. There are also lots of other examples of projects that have been made using this download there for you to see too.
The actual flower on my project has been made from the download too .. .. the flowers print out as an actual flower and it is just a case of cutting them out and layering them up (I did use a punch for the green background leaves - no way would I be cutting those out!!).
The hearts and the sentiment are from one of Funky Hand's brand new stamp sets - Love 'n' That. There are lots of images on the stamp set .. .. as you can see here .. .. but I just chose to work with the hearts on this one and paper pieced them using again the papers from the Hearts and Flowers download.
Have you ever made and easel card? I had only made rectangular ones until I tried this one .. .. and as it worked first time I thought I would share with you how I did it.
I cut my circles using a circular die in my cuttlebug machine .. .. but you could just as easily draw around a plate or a CD and cut it out with scissors .. .. .. well you can use anything circular really and any size you fancy.
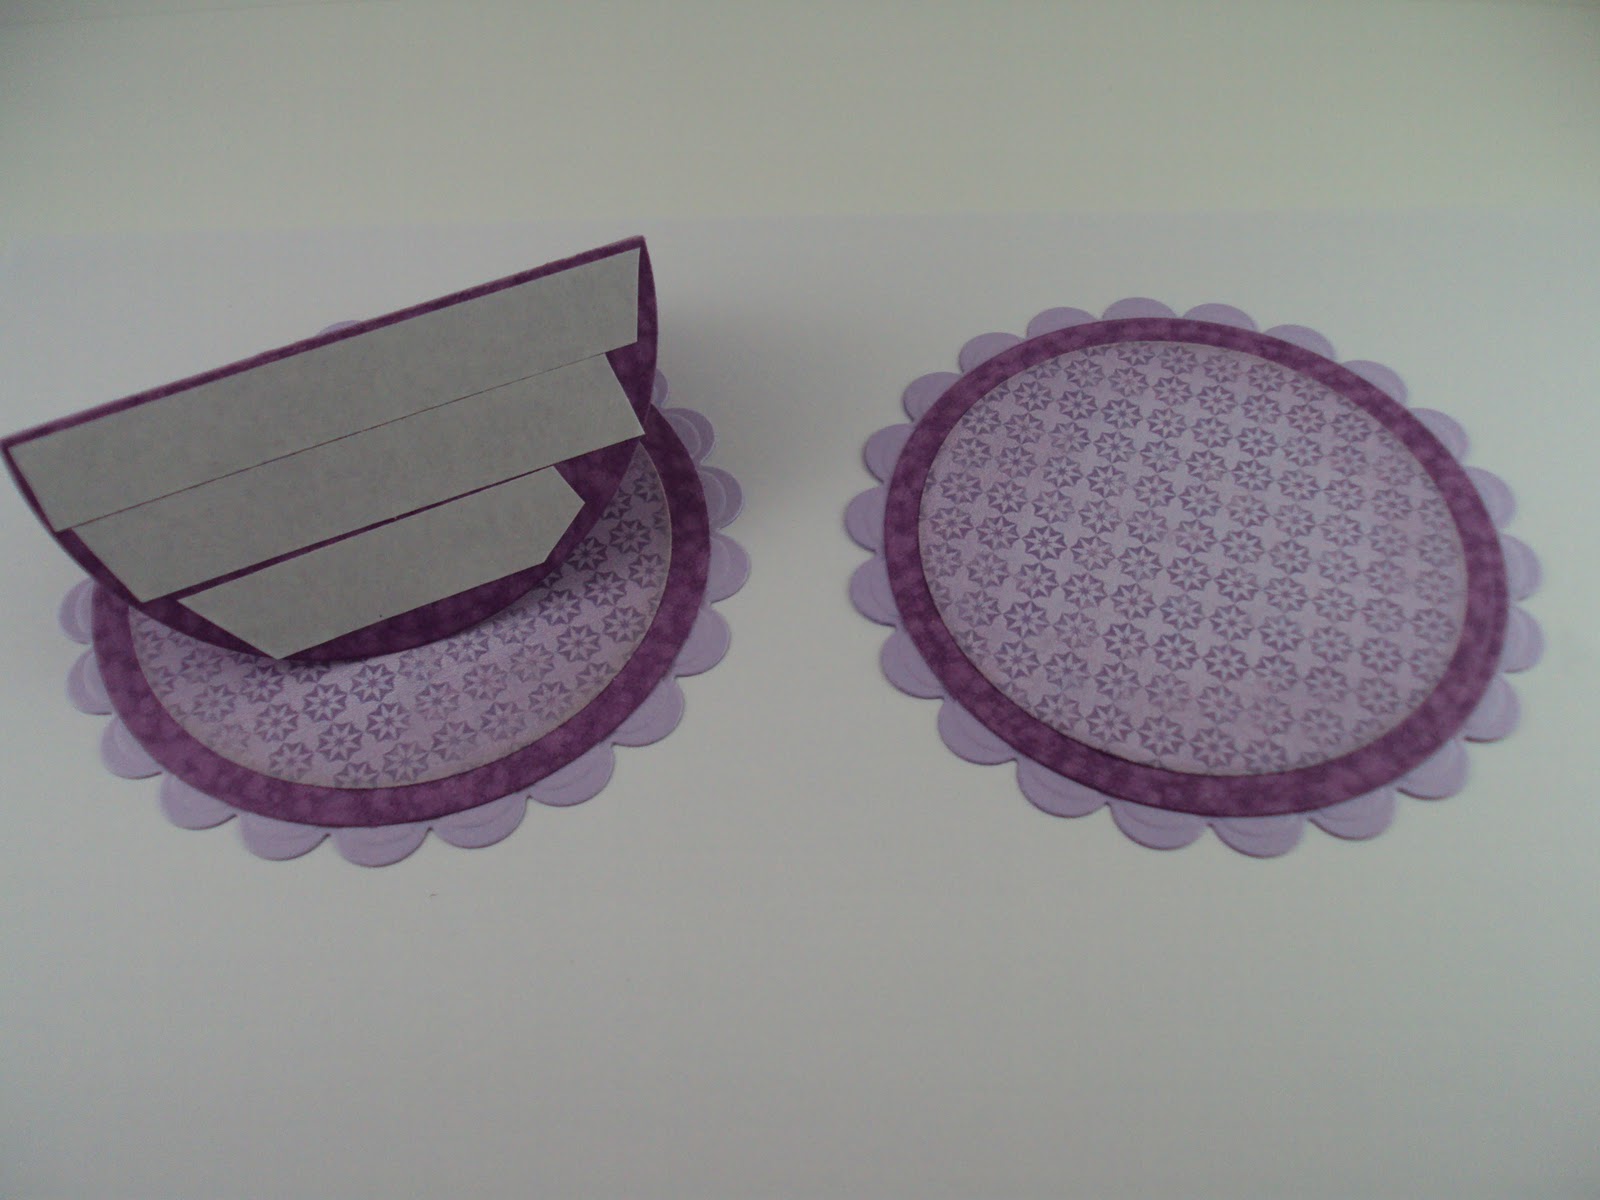
Start off with a folded piece of card. If using a nestability die in your cuttlebug (as I did) place the die so that the fold lies inside the circle .. .. .. if using say a CD .. .. you would place the CD so that the fold is underneath the CD.

You can see in the picture below all the elements I cut and the letter "A" is where my fold is.
- I have my circles that are joined at the fold (which will form the base of my card)
- another plain circle (for the face of my card)
- and two scalloped circles (just for decoration .. .. .. you don't have to have these).
Next open out the circles that are joined together and fold one of the circles in half.
The new fold you have just created is marked as "B" in the picture below.

The folded base of your card now looks like this .. .. you can see how easily it all takes shape.

Next cover just the lower half of your folded circle with glue or double sided tape as below.
So above you will see my double sided tape is on and I have glued on my decorative paper and scalloped circles to both the folded base section and what will be the "face" of my easel card.
To finish off you simply remove the backing off your tape and attached the face to the base by sticking one on top of the other. Lining everything up nice and neatly.

Open your card up and you can decorate it as you wish. You do need to put something on the base to keep the face of your easel card from falling down .. .. some people use a button or a brad, a flower or a layered sentiment but I have used a piece of ribbon that I have ruffled onto some extra strong double sided tape.
I hope that I have explained this clearly enough for people to follow.
This technique works so well that I tried it with other shaped dies that I have and you can create them as squares, ovals, .. .. I even managed a heart shaped one!!
If I have inspired you to take part in the challenge .. .. which I hope I have .. .. that would be great. I would love to see your interpretation of "Going Round in Circles" .. .. but remember that you do need to use as least one Funky Hand paper, or image on your creation. If you don't have any at the moment then Anice has very kindly provided a free download for you to use .. .. .. which very coincidentally has circles on it!! LOL!!! You can find that at the very end of all the downloads that Anice has produced here.
I hope you like what I created and that my little tutorial was useful. If you would like to see the full list of all the ingredients I used on my project then you will find this on my own personal blog which you can find here.
If you would like to enter our Get Funky! Challenge then link your project on Allison's challenge launch post here.
The next Funkette to be sharing with you is Lou and she will be here on the 21st January.
Have a great day everyone and happy crafting!!!
Love Jules xx
wow, that is soooooooo pretty. thank you for sharing how you made this.
ReplyDeleteJules , Thanks so much for sharing this tutorial - easy when you know how ain't it? Would love to see how you do the heart shaped one too! Fabulpous card and I am in the process of making my card for this very challenge right now!! Sheila;)X
ReplyDeletethank you so much for the fab tutorial jules, I have never made an easel card with my nesties so i will hae to have a go now i know how!!
ReplyDeletehugs Lou xxx
A great tutorial Jules.xxx
ReplyDeleteOh Jules lovely card fab instruction, thanks
ReplyDeleteFi xx
This is a stunning card, I love making shaped easel cards!
ReplyDeleteNever though to ruffle ribbon to use as a stopper though! Thanks so much for sharing!
This is brill - i've never made a circle easel card before... I NEED to make one!!!
ReplyDeletePaula x x x
Oh wow what a lovely card, you didi a great job. Nice colours.
ReplyDeleteFi xx
This is such a great card. Love the colors and most of all the shape. I will be trying this soon. Thanks
ReplyDelete