Hi all,
It's Debbie here for another Get Funky and Craft instalment. I don't know about you but everytime I go to make a rosette I forget how wide to do do the strip for folding so off I go and check through my mags etc..... So I thought I'd put a few pics up to show you how I made mine.
I used the winter wedding papers and the 'you're having a baby doodlewords which will be released very soon here. A button, some bakers twine and card candi are all that I added.I also used a pram digital stamp from the Wishes and Kisses cdrom
Here's what I printed off for my card: 1 sheet of paper by dragging and dropping the digital papers and doodleword using a graphics program like Craft artist etc.
From an A4 sheet of paper I cut a strip - 1 and a half inches wide.
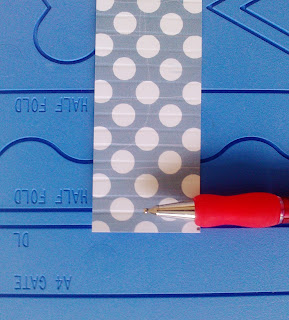
on my scoreboard I scored as shown above.Then did a concertina effect - valleys and folds.
Join each end together and trim any excess.So that it looks like the pic below.
Push the rosette down and glue a piece of card on the back to hold it in place.
And there you have it - your very own rosette.
We'd love to see anything you make using any funkyhand product.I'd really love to see you have a go at a rosette too.Why not show us either here by adding your link here or on our facebook page. we'd love to see what you create with any of the funkyhand products, so don't be shy!
Big crafty hugs Debbie x


This tutorial is brilliant Debbie. I have never known how to make a rosette, now I do. Prepare to see them on my future cards.
ReplyDeleteAnice xx
oooh thats fab debbie, I always forget the bit for the back of it and wonder why its popping out at me when I splodge my glue down the middle!!!!
ReplyDeletehuge hugs Lou xxx
those papers work brilliantly for a rosette. great tutorial Debs
ReplyDeleteBrilliant work as always Debbie xx
ReplyDeletehow lovely Debbie
ReplyDeleteAllisonx