Showing posts with label Kathy. Show all posts

30 June, 2015

Keepsake Box by Kathy

Hi, it's Kathy today, and this time I'd like to show you a Keepsake Box made using the "Sunrise" designs from this month's showcase CD
"Now That's Funky"  

 The inner box part of this measures 10cm square by 3cm deep, so it's a good size for storing all manner of jewellery, knick-knacks, or maybe those pads of paper to keep by the phone


Materials and Tools
"Sunrise"   from the Funky Hand CD "Now That's Funky" 
the designs were all printed on textured white Bazzill card 
Bazzill card in the deeper colour to make the wrap-around section of the box 
Empty cereal packet for the structural pieces 
 Ribbon
Dies: Square doily (Spellbinders) 
Shapeabilities Sprigs (Spellbinders Die D'Lites) 
"Build a Flower #2" (Cheery Lynn)


The thing about this box is that it's much easier to make than it looks, which is always good in my book!  You just need to make the inner box from card - or cover one you already have with pretty Funky Hand paper, then make the wrap-around cover to stick it in to! 


This cover is made in the same way used for the memo blocks I've shown on here in the past, but with an extra flap at the front.  You can find instructions for the memo block on THIS page of my blog
The layout for the pieces of chipboard (grey) on the coloured card is like in the picture below.
 Remember to use a bone folder in the gaps so that the cover will fold nicely.  Turn in the margin all the way around and then add the inner cover to conceal all the workings, use the bone folder again in the hinge sections, then adhere the lower piece of ribbon in place before adding the box section.
The upper ribbon is adhered to the centre of the top section of the wrap, and then the box is ready to decorate
 
Don't forget, this CD is on offer in the SHOP for just £1 at the moment so don't miss out! Here's a quick look at just some of the designs you'll get on the CD


We'd love to see what you make with Funky Hand goodies too.....
Thanks for visiting today


20 June, 2015

Lollipop Flowers


Hi, it's Kathy today, and I've a couple of cards to share this time.
 I've made these using the pretty "Lollipop" colour-way from this month's showcase CD
"Now That's Funky"  

As you can see, I've used the same style for the background, but changed the LO for the flowers and the dies I've used to make them

card 1 

Materials and Tools
"Lollipop"  from the Funky Hand CD "Now That's Funky" 
the designs were printed onto Diamond White Bazzill card 
which has a lovely, subtle sheen 
hand cut banner, decal sentiment
Dies:
"Tea Rose medium" (Cheery Lynn)
Tiny circle punch
Notes:
I used my craft knife to cut an aperture in the card blank, then adhered the patterned paper behind it.
I cut a rectangle from the block design paper, then cut another rectangle from it to leave the narrow border piece


card 2


Materials and Tools
"Lollipop"  from the Funky Hand CD "Now That's Funky" 
the designs were printed onto Diamond White Bazzill card 
which has a lovely, subtle sheen 
 decal sentiment
Dies:
"Hybrid Rose" (DieNamics)
Leaves cut with "Build a Flower no2" die set (Cheery Lynn)

Notes:
This time I didn't cut an aperture in the card itself.
I cut another border piece from the leftover block-design rectangle from card 1, then just cut a smaller rectangle from the leafy, flowery design to fit inside.


Don't forget, this CD is on offer in the SHOP for just £1 at the moment so don't miss out! Here's a quick look at just some of the designs you'll get on the CD


We'd love to see what you make with Funky Hand goodies too.....
Thanks for visiting today


12 June, 2015

Pocket Page Book, by Kathy

Hi, it's Kathy today, and this time I'd like to show you a mini pocket album I've been making with the "Cold Walk" designs from this month's showcase CD
"Now That's Funky"  

 I've not decided what to use this book for, so it's still empty and lacking a title at them moment.


I've used a Hinge Binding method for my mini album.  There are loads of variations on this, and masses of tutorials on the web, but this is the one I used to learn how to make one:
 [ Hinge Binding video tutorial ]

There's loads of room for photos etc as each "page" is a pocket, so as well as decorating the pages, a photo or journalling can be added to each side of the tags that go into them too.


Materials and Tools
"Cold Walk"  from the Funky Hand CD "Now That's Funky" 
the designs were all printed on textured white Bazzill card 
Matching Bazzill card in blue to make the hinge section and the ends of the tags
EK Success border punch to decorate edges of pockets
On the Cover 
Ribbon, hand-cut banners, hand made Rolled roses,
Tiny blue gems, Stickles Glitter Glu, Die cut roses, lavels and swirls

Dies: Nesties Labels 18 (Spellbinders) 
Shapeabilities Sprigs (Spellbinders Die D'Lites) 
"Tea Rose medium" (Cheery Lynn)

Here's a quick picture tutorial on how to make the pocket pages, I hope it makes sense - you should be able to click for a larger view

For the tags, I printed on both sides of my card.  I resized to 1/4 size versions of the designs so that when cut out the tags, both sides are pretty!
I didn't have a tag die the right size to make the end bits for my tags, so I found an image on the web, "cut" it down in my graphics program so that only the fancy end remained, then put it into my Silhouette Cameo to resize and cut to fit.  There is one of these end pieces on each side of the tag so that it's nicely reinforced and won't break despite going out and in their pocket


That's it, I hope you like this book and maybe you'll use your Funky Hand stash to make your own pocket book.  It's the right time of the year to be thinking of albums for photos of all your summer adventures and you're bound to find just the right papers to show them off with on a Funky Hand CD or download collection
 
Don't forget, this CD is on offer in the SHOP for just £1 at the moment so don't miss out! Here's a quick look at just some of the designs you'll get on the CD


We'd love to see what you make with Funky Hand goodies too.....
Thanks for visiting today


30 May, 2015

Boho Chic Juice Carton, by Kathy


Hi, it's Kathy today, and I've yet another box to show you! 

 I wanted to come up with something big enough to fit the "Established 1994" t-shirt I'd bought for the 21st birthday of one of my nephews. I also wanted to make something more interesting than a "flat" box so he wouldn't have a clue what could be inside! 
 Based on a milk carton style box, but in size more like a juice carton, this one stands 26cms high and the sides all measure about 10cms, so it's quite a chunky beast  


I've used "Boho Chic" designs from this month's showcase CD "V. Funky to make my Juice Carton Box. Believe it or not, the main carton only needed 2 sheets of printed card to make.  Each sheet of card makes 2 sides, and by
 choosing the horizontal striped design I made lining up the 2 pieces nice and easy (sneaky, eh?)


Materials and Tools
"Boho Chic" from the Funky Hand  CD "V. Funky
the designs were all printed on textured white Bazzill card 
EK Success border punch to make decorative panel
For the tag:
More of the paper designs, printed in smaller sizes
Corner Rounder,
Pointed Circle dies and plain circle die (both Spellbinders)
Numerals are felted stick-ons (sorry, I can't remember the make)
Natural raffia


Don't forget, this CD is on offer in the SHOP for just £1 at the moment so don't miss out! Here's a quick look at just some of the designs you'll get on the CD

We'd love to see what you make with Funky Hand goodies too.....
Thanks for visiting today


20 May, 2015

Spring Morning Gift Bag, by Kathy


Hi, it's Kathy today, and this time I've a gift bag to share with you

I've used  "Spring Morning" designs from this month's showcase CD "V. Funky to make this one, and it's nice and easy because I've used an Xcut die


Materials and Tools
"Spring Morning" from the Funky Hand  CD "V. Funky
the designs were all printed onto "Diamond White" Bazzill card, which has a lovely soft sheen to it (but makes photographing difficult!)
Gift Bag die set (Xcut)
Tab closure is hand cut
EK Success border punch
Tag die (Crafters Companion)
the Flower on the tag is made with this paper:
I printed it in 2 sizes and coloured the petals with 2  colours from the Spring Morning collection, then cut the flowers out by hand
Tiny circle punch (Xcut )
Bakers Twine
I hope you like it - my tip for today is to experiment at printing on different kinds of paper and card - you'll find lots of new ways to use your Funky Hand stash!

Don't forget, this CD is on offer in the SHOP for just £1 at the moment so don't miss out! Here's a quick look at just some of the designs you'll get on the CD

We'd love to see what you make with Funky Hand goodies too.....
Thanks for visiting today


12 May, 2015

No-Glue Box by Kathy


Hi, it's Kathy today, and I've another box to show you this time. 

I received some cookery ingredients through the post recently - they are cleverly packaged so that the larger box fits through a regular letterbox, and in that box are four smaller ones. 
These little, plain kraft-coloured boxes are very cute and tbh, as there's no glue or anything holding these boxes together, they were "crying out" to be unfolded and used as a template for something prettier!

Although the box is made from my "drawn around" template, I've also made sure to save it in my Cameo files so that I can not only use it again, but scale it up or down in size too

I've used "Thyme Blossoms" designs from this month's showcase CD "V. Funky" to make this one - printed on both sides of my sheet of textured white Bazzill card so it's pretty inside as well as out. Here you can see it all unfolded
 
I made a "belly band"  not only to keep the box closed, but also by cutting out and layering a couple of flowers from one of the paper designs, it's the decoration too

Materials and Tools

Papers: "Thyme Blossoms" from the Funky Hand  V.Funky  CD
the designs were all printed on textured white Bazzill card 
EK Success border punch
and then I made a small 10cm square gift card to match, using another cut out flower, some pearls and a piece of Bakers' Twine

Don't forget, this CD is on offer in the SHOP for just £1 at the moment so don't miss out! Here's a quick look at just some of the designs you'll get on the CD

We'd love to see what you make with Funky Hand goodies too.....
Thanks for visiting today

24 March, 2015

"Wake Up Year" (Kathy)


Hi, it's Kathy here with a card to share today.  

These papers from the Funky Seasons CD - they are from the section called "Wake Up Year" and definitely  reflect the colours in my garden right now with the bright Spring greens, daffodil yellows and the purple irises 
Materials and Tools

Papers: "Wake Up Year" from the Funky Hand  Funky Seasons  CD
Xcut tiny circle punch 
Golden-yellow gems

The 3D flowers are cut from one of the paper designs


Don't forget, this CD is on offer in the SHOP for just £1 at the moment so don't miss out!
We'd love to see what you make with Funky Hand goodies  too.....
Thanks for visiting today

14 March, 2015

Spring Whispers


Hi, it's Kathy here with a card to share today.  

I've chosen the "Spring Whispers" papers to use for my card this time.  You'll find them on the Funky Seasons CD which you can find HERE


Materials and Tools

Funky Hand CD: Funky Seasons 
Dotted Doily Circle Frame die set(Sweet Dixie)
Hyprid Rose (MFT)
 "Twirly Swirly" die set (Taylored Expressions)
2x circle punches for details


Don't forget - we'd love to see what you make with Funky Hand goodies  too.....
Thanks for visiting today

04 February, 2015

2 Little Birds

Hi, Kathy here today with a cute little box made using
 the "I Heart You" download

I've been meaning to make one of these birdhouse-shaped boxes for ages and what better time than now?
This box opens at the base for adding some little treats - though I think it would need a little bit of tape to make sure it stayed closed.  If I made another I would try and come up with an alternative - maybe make a little door at the back and seal the base up altogether.

 I printed the designs I wanted to use onto white Bazzill card. then cut the box pieces one using my Silhouette machine. 
 When I print onto card I cut the 12x12 sheets down to just under A4 width, which leaves a long narrow cut-off which I don't want to waste, obviously! 

 One of the great things about Funky Hand downloads is that you can resize the designs - maybe "cut" a little bit off the side, then alter your printer's settings so you can print onto odd sizes of paper or card.  So I print the main pieces on the large sheet, then use the off-cuts to print any smaller pieces I need - I hope that makes sense!

Basically, by doing this, and printing on both sides I only used 1 whole sheet of 12x12, plus an extra off cut length from my box of scraps

Materials and Tools
Silhouette machine to cut box shape
Spellbinders Nesties: plain circle and Lacey circle
EK Success border punch for "tiles" on roof and the gable design

Heart feature at the top of the box is cut from one of the papers
Little birds are hand-cut, as is the door
Perch is just a tightly rolled scrap of paper, glued up then poked through a small hole made with needle tool and bamboo skewer
The birds are attached to the box with cut up pieces of foam tape so they stand away from the box


 There you go - a cute idea for a little Lovebirds box to fill up with treats for your own loved one. I hope you like it

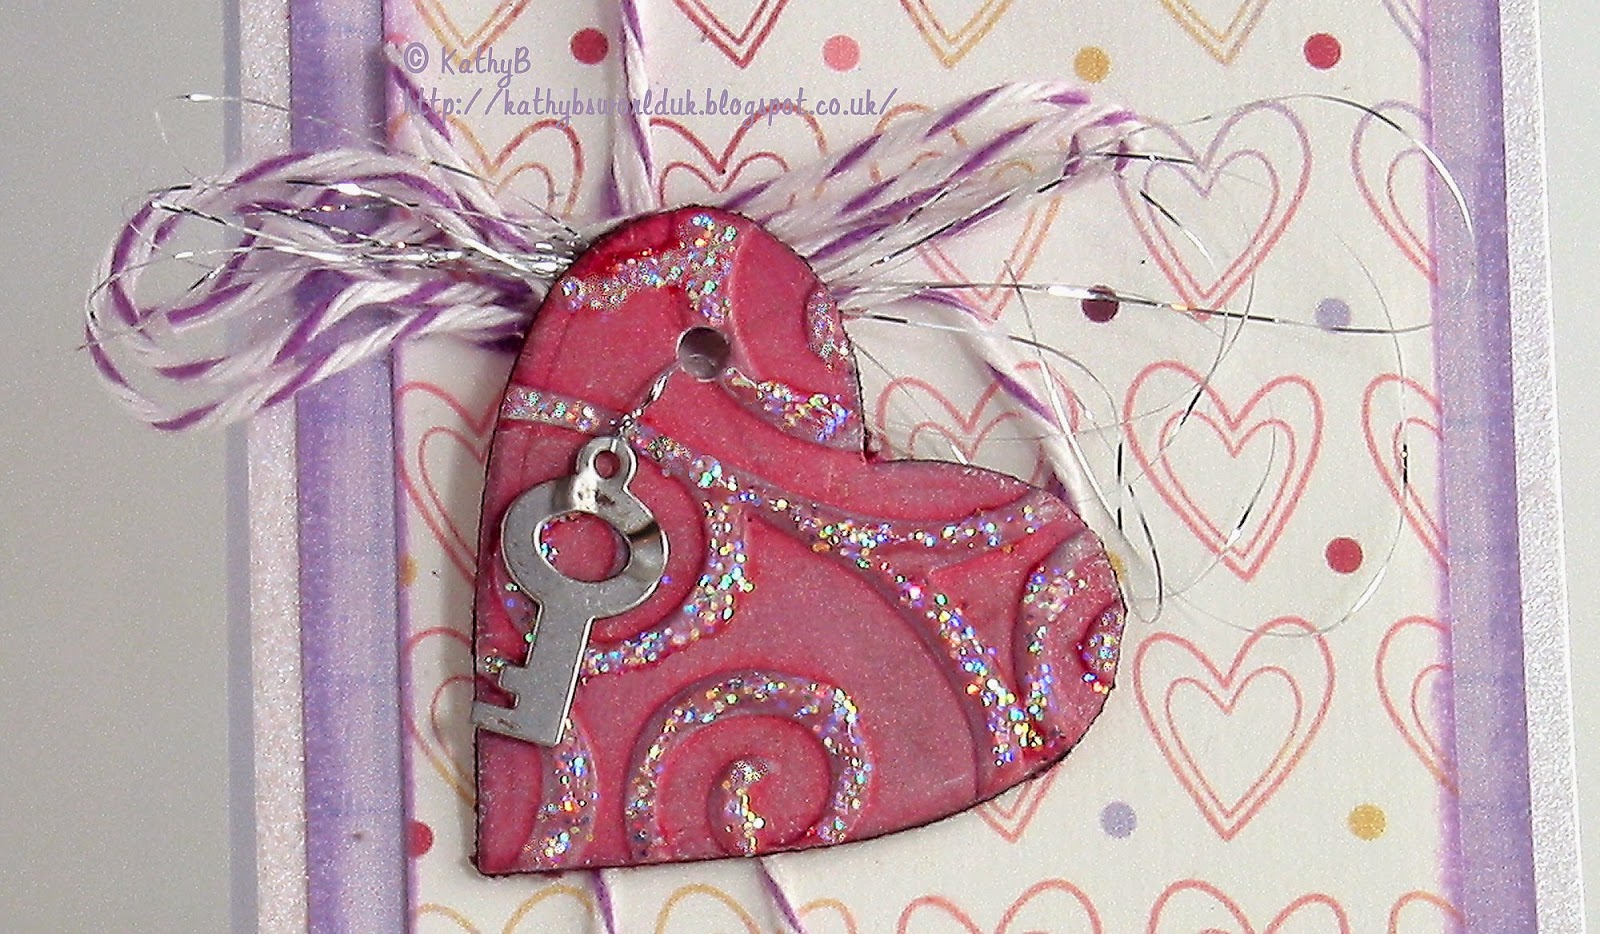
I had some leftovers after making the box so I made a scrapling card


Materials and Tools
Scraps of  Funky Hand Download  "I Heart You"
Baker's Twine and Silver thread
Small metal key charm

The big heart is made by covering both sides of a  scrap of card then die-cutting (DieNamics Nesting Hearts)
I then embossed it with a Cuttlebug "Swirls" folder, inked lightly with a silver ink pad, then traced over the swirls with Stickles Ice glitter glue (Crystal Ice)
The tiny punched hearts were shaped with an embossing ball tool then dixed in place with a blob of Glossy Accents


Remember, all the "Love themed" downloads are on a Special Loved-Up price of only £1 each all through February, so a great time to stock up on downloads you may have missed.

We'd love to see what you make too.....
Thanks for visiting today

16 August, 2014

Sleigh Ride in Summer

Hello

It's Kathy here today and I'd like to share something I made this week using a new die and my fabulous Funky Hand stash.

Since becoming the proud owner of an eBosser machine, the world of A4 dies and embossing folders has been opened to me and I recently got my hands on a fab die for making a really neat gift bag. 
 The finished bag is 12cm wide. 18cm high and  7cm deep - so plenty of room for goodies in there!


As this is a big die making a good sized box, you need to cut the die twice and you need 2 sheets of A4 paper - so what better way to give the die a test run than with some Funky Hand designs.

Do you recognise these papers?
I chose to use "Sleigh Ride" which was one of the 2013 Christmas lines.  A little bit "left field" for crafting in the middle of August, I know, but I love these colours and several of the designs are not really Christmassy at all - it's such a shame not to use them for other projects, don't you think?

So I printed two copies of the gorgeous spotty pattern onto some white Bazzill card (any sturdy paper or thin card would do), plus another sheet to make the striped "border", the bow, gift card and flower decoration. As I knew both sides of the tag, bow and flower would be seen I printed on both sides of the card I needed to make these.
Then it was just a case of doing the die cuts and sticking it all together. 
I used one of the bits of waste (from the hole in the handle) to make a closure for the bag.
The bow and the tag come in the die package.
The bow is clever as its just one piece and you fold it up to create the bow.
I cut the tag twice, then tied the two pieces together with some seam binding.  I punched a tiny heart in the corner of the top piece
The flower is made with 5 punched flowers  here's a closer look at the decorative bit:

 Ingredients
"Sleigh Ride"  download from  Funky Hand
Paper or card for printing
Gift Bag with bow and tag; A4 die form Xcut 
SU Blossom punch, Tiny heart punch
Seam Binding or Ribbon

The bag was so quick to make and using Funky Hand papers means bags and boxes look great even before you start decorating them! 
I'm thinking this would look fab in the gorgeous deep blue shades of the Winter Wedding collection for a more masculine gift wrapping.  I have the lovely pin striped papers in mind, but I just need to figure out a more manly decoration that a bow and a flower and then give it a try.
That's it for now - I'm off to print out those Winter Wedding papers and
 have a go - if you pop by my blog sometime soon, you might find that I actually got it done ;) 
Stranger things happen at sea.....as my Grandad used to say.

Thanks for visiting - please leave a message - it lets us know we're not just talking to ourselves!

Happy Funky Crafting